With the arrival of the new 15mm British vehicles, I needed to paint some ready for release (next week, in case you were wondering). I thought I’d try out a technique I’d read about (notably on the Hammer’s Slammers site) but had yet to give a go to. This involves using Blu-tack (other brands of ‘reusable putty-like pressure-sensitive adhesive’ are available) to mask off camouflage patterns for spraying.

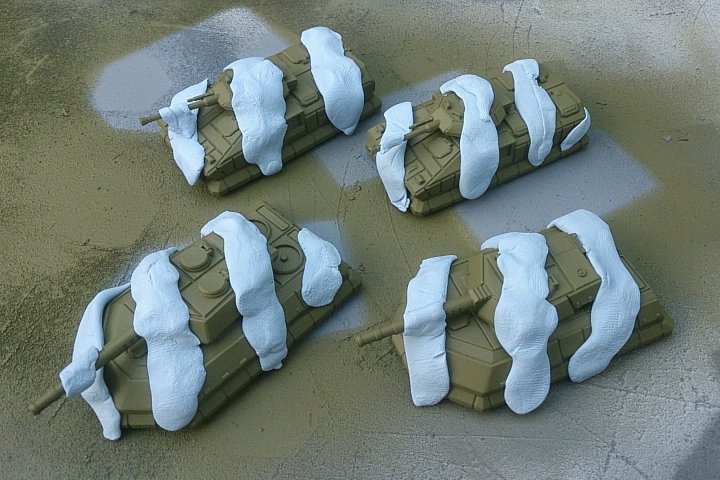
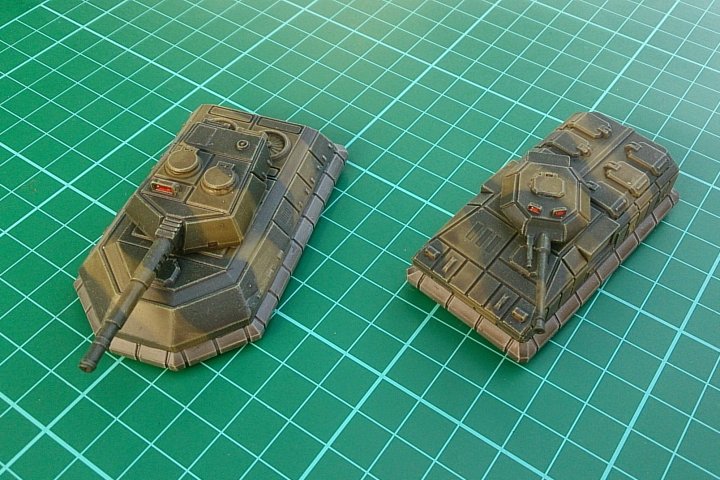
I started by assembling two Apollo tanks and two Artemis APCs and undercoating with Halford’s grey automotive primer. After this had dried (about an hour in the sun) the vehicles were then base-coated with Plastic Soldier’s ‘Russian Uniform’ from a spray can and left to dry. It was a reasonably warm day so the paint was touch dry within five minutes and pretty well set in an hour.
I then set to work with the Blu-tack – just a simple diagonal stripe pattern was what I was after, nothing fancy for my first attempt. I found (after the first couple of vehicles) that the best way was to roll out a sausage of Blu-tack and then flatten it with a thumb to make an irregular shape. I was working outdoors on a glass-top table on a warm day, so the Blu-tack was nice and soft and the glass table was perfect for rolling/flattening it out. I did the vehicles in one piece, with the turrets on. I made sure to push the Blu-tack down into the corners between turret and hull, and wrapped small pieces of Blu-tack right around the gun barrels so they were masked properly.
Then it was indoors to the airbrush. I sprayed the exposed parts of the models with Vallejo Model Air Black-Green, making sure I hadn’t missed anything (under the bottom of the gun barrels is a favourite spot to miss). At this point things aren’t looking all that promising, but bear with me …
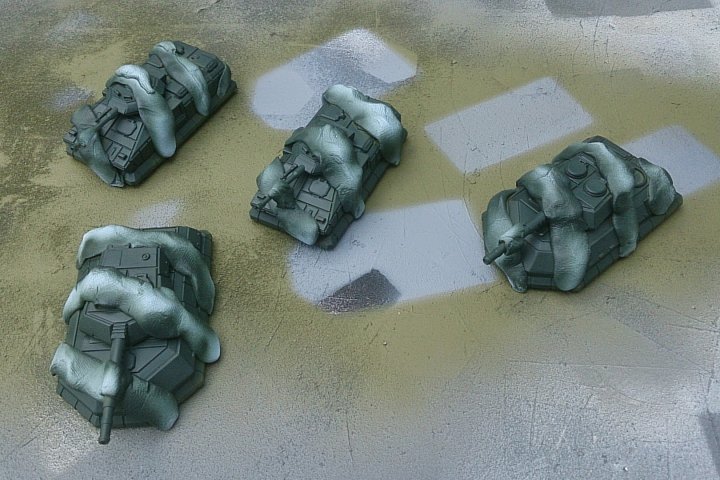
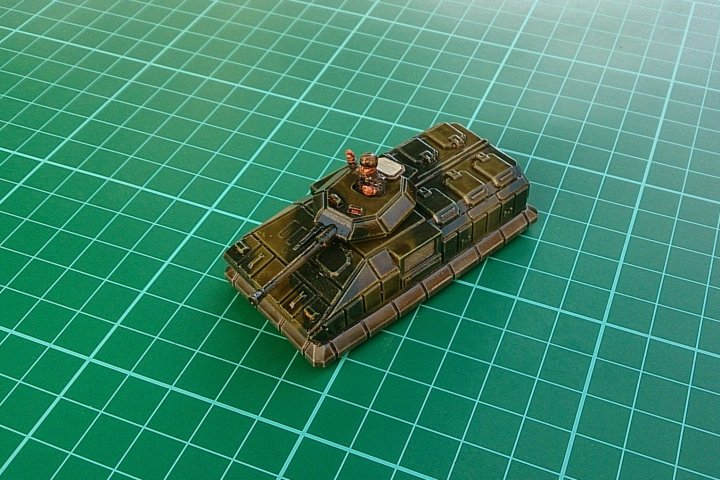
I peeled the Blu-tack off straightaway, as soon as the paint was touch-dry (which was almost immediately – I was unmasking the first vehicle as soon as I finished spraying the last one). If you leave it any longer you run the risk, however slight, of the paint cracking as the mask is removed. Et voila – two-tone camouflaged tanks. The effect was that of a soft-edge mask, different from using something like masking tape, and I think very effective, much different from what you’d get with a paintbrush.
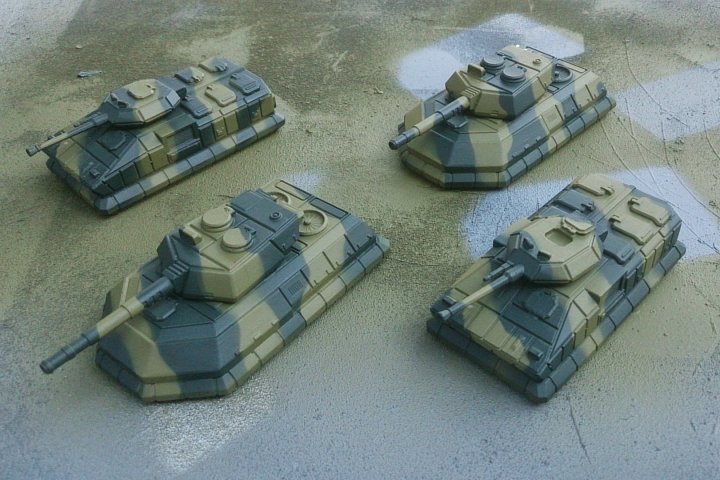
The models were then highlighted and detailed using a mix of Tamiya and Citadel paints before getting a coat of Army Painter Strong Tone shade applied with a brush (I don’t hold with the idea of dunking your models in the tin !). This is another process that has you saying to yourself ‘what have I done …’ as the models look terrible with the thick, gunky high-gloss finish …
… but a coat of Flat Varnish later and all is fine. Incidentally, I don’t know about anyone else but I find that the Army Painter ‘Anti-Shine’ varnish doesn’t agree with their dip at all on large items such as vehicles. I almost wept when the finish on a batch of Ainsty Blower Tanks crazed as soon as the AP varnish hit the dip. Oddly enough it works OK on figures, it just doesn’t like large flat surfaces. This wasn’t a one-off occurrence that I would put down to temperature/humidity/atmospherics, it’s happened every time I ‘ve tried it. So be warned. Instead I use Tamiya XF-86 Flat Clear, slightly diluted (only about 10%) and blown through my airbrush. The AP dip provides a really tough protective coat so the surface only needs to be dulled down.
I suppose you could recycle the Blu-tack and use it again but it’s gunky and covered in paint, so I didn’t bother. I bought my Blu-tack in a 99p shop and used about half a pack for four vehicles, so I think 12p per model is a price worth paying. I’ll definitely be using this technique again.
You must be logged in to post a comment.