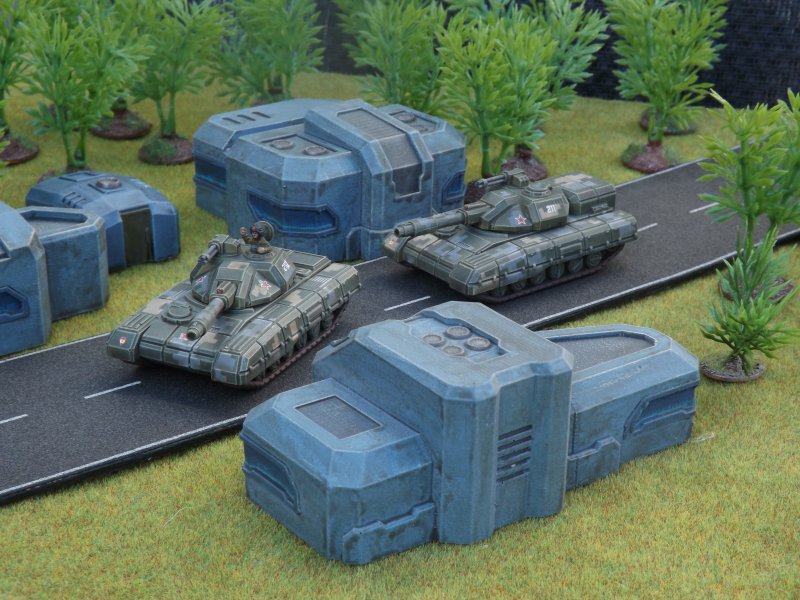
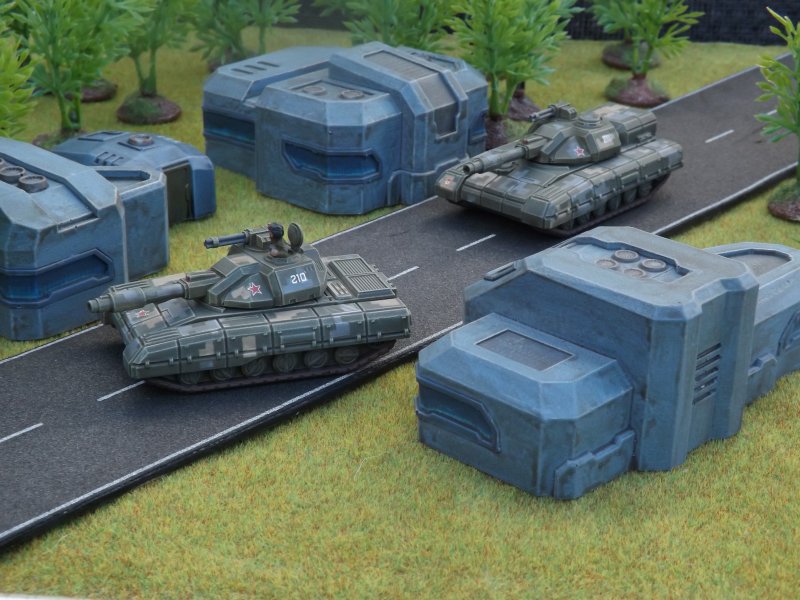
In preparation for the release of our new 15mm Neo-Soviet tanks, the Vombat and the Bars, I wanted to paint up some samples for the website. Inspired by an article written by the editor in the February issue of Miniature Wargames I thought I might try out the airbrush stencils made by Anarchy Models. I came across them at Salute last year and picked up a leaflet, but hadn’t got round to ordering any. I decided, perhaps over-ambitiously (you decide), to go for a three-colour ‘urban’ camouflage scheme using the Digi Camo stencil set. An A4 sheet cost £8.99 with postage at a fixed £2.50, so at the same time I ordered some other sets (which I’m sure will be appearing in future painting blog posts).
The painting process was done over several days, indoors and out and in different lighting conditions, so you’ll find the photos vary in colour and lighting (and quality – a couple aren’t as well focused as I would like). I tend to take photos of step-by-step articles like this on my smartphone, rather than having the proper camera setup on the tripod – it just gets in the way.
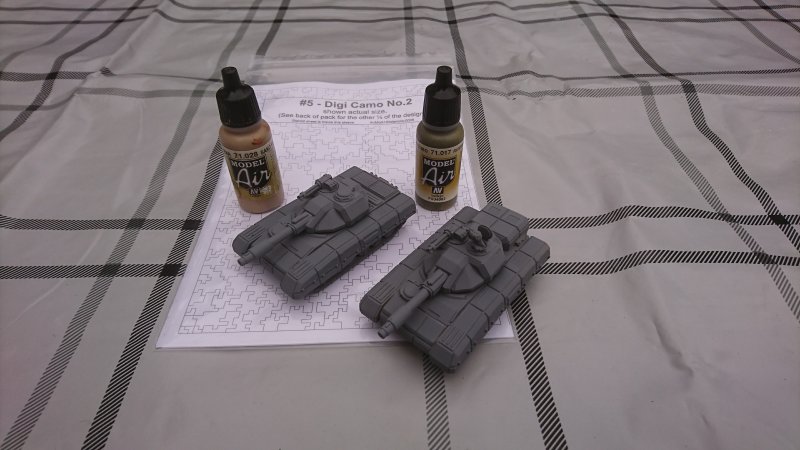
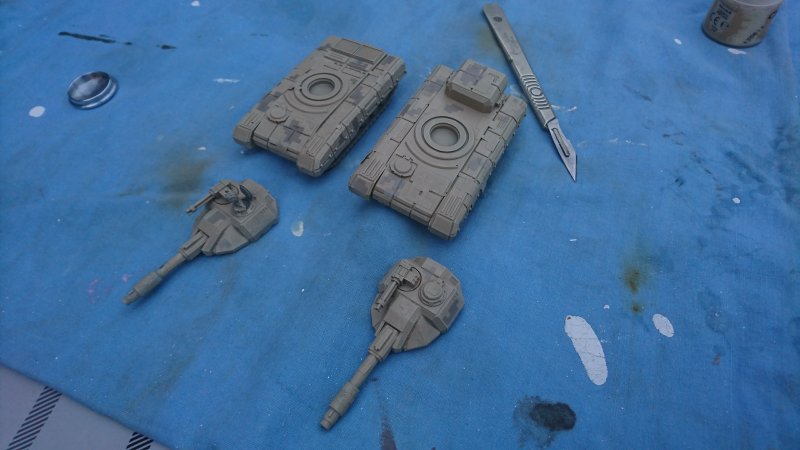
Assembly is straightforward enough – the hull of each tank is in three resin parts (hull and two track units), with a metal turret and main gun, two-part secondary gatling and hatches. After assembly with superglue I gave them a coat of Halfords grey primer which was also to act as one of the three colours in the camouflage scheme. I had decided to drybrush each colour as I went along rather than attempting to highlight each colour at the end, so the first highlight stage was a drybrush of Citadel Longbeard Grey over the whole model – drybrushing works very well on the hard-edged panels of the tanks.
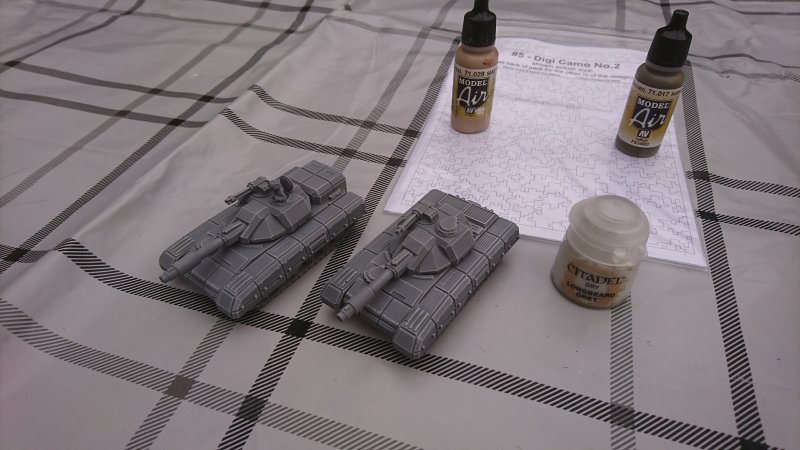
So now it’s time to apply the first set of stencils. They come as a single self-adhesive sheet which has been rather cleverly pre-cut into multiple small pieces. The Digi Camo scheme utilises lots of little squares joined together into panels of varying size. They come off the sheet by bending the backing paper and peeling them off, just like a sticky label. I used to point of a scalpel to position them on the model then pushed them down with a finger. I tried to align them with the model, rather than laying them down at random angles. I found that it was possible to make them stick when bent round corners, as long as it wasn’t too sharp an angle. I also had to remember that this was just the first layer of camouflage, so I had to think ahead about where the next layer was going to be positioned and leave spaces. You can just about see the stencils stuck on the models on the image below.
The first airbrush coat (the second camo’ colour) was a Vallejo paint, Desert Sand, which went all over the model. Once dry, everything was drybrushed with Citadel Dry Terminatus Stone (barely visible below, but it is there !)

I then started to put on the next layer of stencils. I hit two small snags – the first was that the stencils didn’t seem to want to adhere to the new layer of paint quite as well, so getting them to go round corners (such as the edge of the trackguards) became a problem. I have no idea why this was the case, but I simply tried to place them on flat areas and avoided the issue. The second, much more minor point was that the pre-cut decal pieces were in many cases too large, especially for a 15mm model, but this was easily solved by cutting them into small pieces with a sharp scalpel and steel ruler. Again, they are just about visible in the picture below as darker areas.
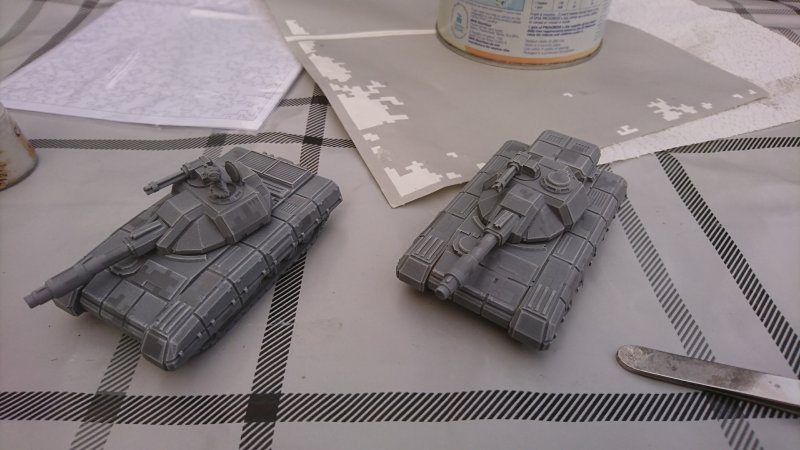
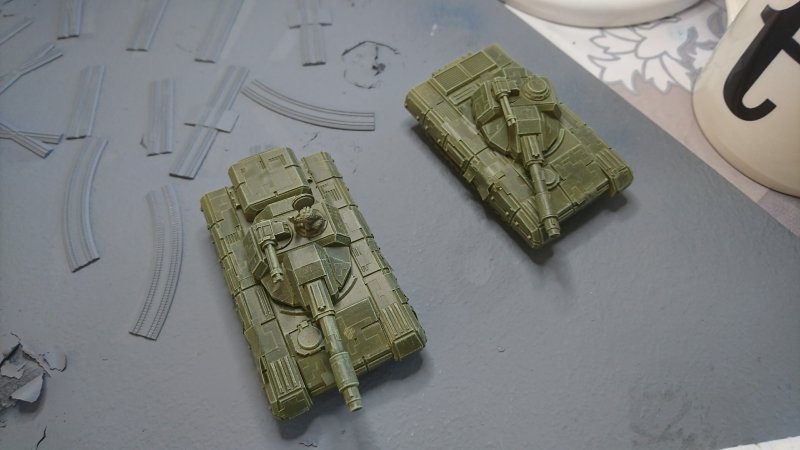
So now it was time for the second airbrush layer, the top coat of Russian Green (appropriately enough). Once dry this was drybrushed with Citadel Dry Nurgling Green
So now for the exciting bit – removing the stencils. They came off using the tip of a scalpel, but unfortunately I managed to scratch the paintwork in one or two places, especially on the metal parts, so I’m wondering if there’s a better way. It also very annoyingly pulled up some of the paint, but only from metal areas – there was no problem on the ones stuck to resin surfaces. You can see in the photo below where the sides of the turrets have bare patches, and it happened on the Vombat’s rear ramp as well.
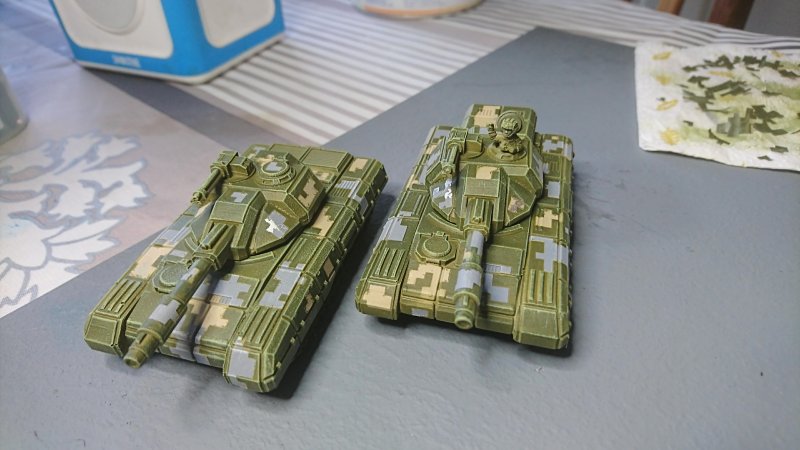
I had to go round and patch these areas by brush (Tamiya Light Grey is a reasonable match for the Halfords primer), and also tidy up one or two patches where the spray had leaked under the edges of the stencils – in places I obviously hadn’t pressed the stencils down firmly enough.
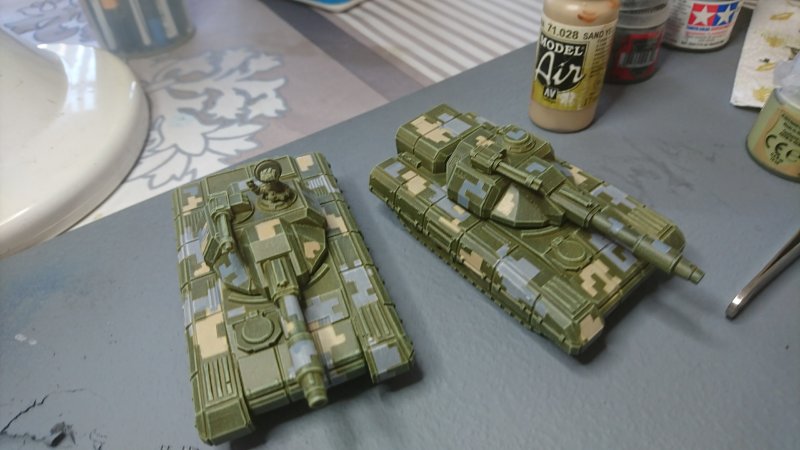
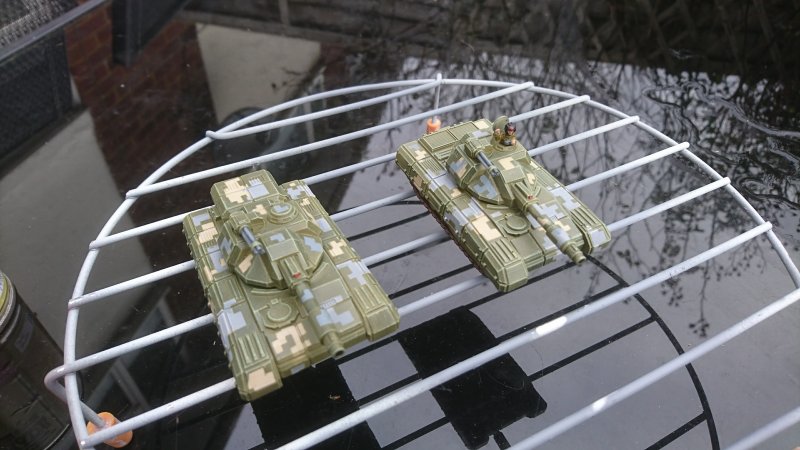
It was then a case of painting in details such as the crewman, tracks, gatling barrels, rear lights and so on. In case you’re wondering, the tanks are sitting on the grill from an old microwave – I use this when painting models all over in Army Painter Quickshade, if left on a normal flat surface they’d stick but the grill leaves little surface area for them to stick to – it’s also good for spraying on.
Decals (stars from Dom’s Decals, numbers from (I think) Flames of War WW2 Soviets) go on the Quickshade before the matt varnish – they adhere nicely to the shiny surface.
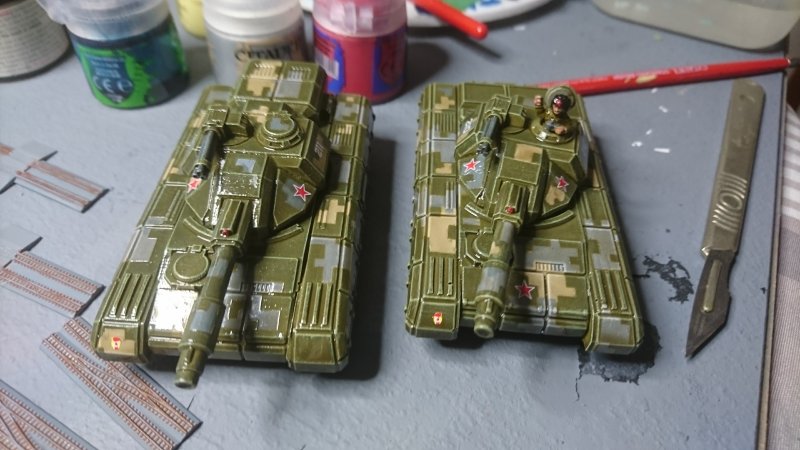
Then it’s an airbrush coat of Tamiya Flat Clear – as I try to mention every time I write one of these, I’ve had persistent problems with Army Painter’s own matt varnish over their dips – it blisters and crazes on flat surfaces, so I reserve it for models that haven’t been Quickshaded.
So that’s it. Despite a couple of minor problems (due mainly to user error rather than any technical problems with the product), I’m very happy with the result. I’m planning to do a full unit using the stencils, although I think I’ll probably only do a two-colour scheme for speed if I’m painting a dozen or more tanks.
You must be logged in to post a comment.