A little while ago I attended the latest Stoke Rochford Aeronef event at one of the finest venues I’ve ever gamed in. The theme for the game was the invasion of England, with Her Majesty’s Aerial forces attempting to see off all manner of nefarious interlopers.
In a moment of madness (probably during the third bottle of wine after dinner at the previous event) I had volunteered to make some terrain to play the game over. Given that this was over six months before, in theory I had plenty of time and no pressure. But, as is always the case, things get left until the last minute so I spent much of the last couple of weeks beforehand feverishly working away to get this ready (our show schedule at the time didn’t help).
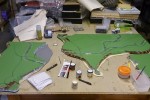
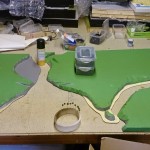
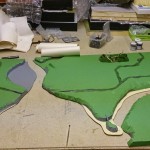
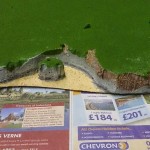
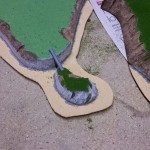
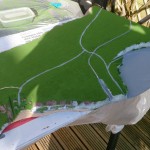
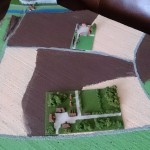
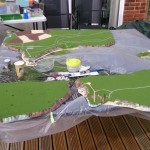
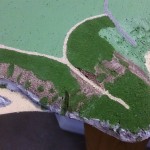
The idea was to produce a piece of coastline based on the Scarborough area in Yorkshire. I rapidly abandoned any thoughts of making a full sized version of the town since it would require a massive number of buildings and not be all that practical to play on, the Aeronef models on their bases wouldn’t have anywhere to stand up. I thus scaled it down to a more rural area of coast with some small villages and hamlets. There were a number of specific features that I wanted to incorporate such as a wide river with bridges, a coastal castle, railway line, pier and small harbour. The terrain was split into several boards for ease of transport. I started by drawing out a plan of the boards on some large sheets of paper (I used cheap lining paper from Homebase) with each of these features planned into the layout. One of the boards was deliberately left featureless with no roads or railway, since I wanted something I could use later for photography purposes.
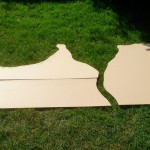
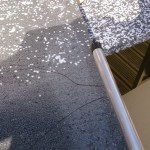
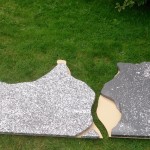

The basic construction of the boards used 1″ insulation foam on a base of 3mm MDF – the latter stops the edges of the boards from being too fragile but, as I discovered, it has a tendency to warp and made the boards curl slightly (even though I tried putting weights on it while it dried). I kept the surface of the terrain flat apart from at the coast itself, this again was to make the terrain practical to play over – rolling countryside would look better but nothing could stand up on it. The MDF was cut with a jigsaw, the foam with a hot wire cutter and the two glued together with DIY adhesive. The coastline was carved and shaped with the hot wire cutter and a very sharp knife with some areas that gently sloped to the sea and other more vertical cliff faces. The edges of the MDF were thinned with a cylindrical sander in a Dremel where the beaches rolled down to the sea and coated with PVA and sand. The whole thing was then painted with household emulsion – I got lucky and picked up a 2.5l tin of grass green for £2 in an end of line sale at Homebase, but other colours were from tester pots, mostly from Wickes. The beaches were painted sand (obviously), the cliffs in grey drybrushed with off-white and the gentler slopes brown. Various quantities of sand and model railway ballast were used to texture some areas.

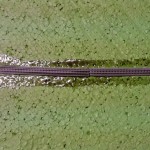
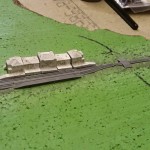
With the basecoat on, the railway was glued down. This had been primed in grey car primer first, and once the glue had dried I gave it a good coat of Army Painter quickshade. Once this had been matt varnished, I ran a silver paint pen along the rails. Although not perfect, this gave a reasonable effect which I was pretty happy with, given that hand-painting the sleepers on over fifty pieces of track was never really a sensible option.

The road layout was drawn on in marker pen first to make sure it worked. I then painted over the roads in grey emulsion on which was sprinkled fine railway ballast. A couple of minor tracks were painted sand with similar coloured ballast.


In one area I painted a few fields in brown and sand to indicate a more rural region. At this point I was finally ready to start flocking the boards, for which I used Woodland Scenics’ fine grass green flock for the main areas and sands and browns for the fields. This suddenly made the boards look more like a region of scale terrain, rather than a messy primary school DIY project.

This article has grown rather bigger than expected, so I’ll leave it there for now – next time I’ll deal with the final details of the terrain and the buildings.
You must be logged in to post a comment.