
At the end of last year I wrote about the creation of the terrain boards for my Stoke Rochford terrain. It’s taken a while to write this follow-up piece, but here it finally is. Anyway, this time I’m going to deal with the buildings and final details of the boards.
My painting method for our small scale buildings is pretty straightforward, aimed at producing decent looking buildings without too much fuss. I start with a white undercoat from a spray can – I wouldn’t recommend a black undercoat for models this small, they end up very dark (I did try it briefly as I hoped it might make painting the windows quicker, but soon abandoned it). The models are then block painted, usually in just two colours, one for the walls and another for the roof. I use various shades of red-brown for brick buildings, mostly Tamiya and Citadel paints. Stone buildings are painted in pale colours such as Tamiya Buff and Deck Tan or Citadel Bone. Roofs are painted in darker shades of brown for tiles, or grey for slates. The brick walls and roofs are then drybrushed using light grey or terracotta shades. Following this they are given an overall wash using Citadel inks – usually Devlan Mud (or its more recent replacement, Agrax Earthshade), but I also use a Sepia shade to produce a different final colour. Once this has dried, I flick round a very light drybrush on more prominent parts of the model. I also sometimes use an orange drybrush (Citadel Ryza Rust) on tiled roofs. The most time-consuming element is painting in the windows in black. The trick is to use a fairly runny black (Tamiya paints are perfect for this) and just dot it in the smaller windows, then let capillary action do the rest and draw the paint into the corners of the window. The final part is to then go round and paint in a few details such as stone edging (the buildings from the Civic Buildings set need this) or larger doors on the factory buildings.


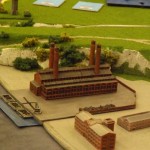
On one building I made an exception to the white undercoat rule – this was the Power Station, which has a lot of large windows. I sprayed this one black first and then painted the window frames round the undercoat, which was much quicker than painting the walls first and then lining in the windows. And since it was a grimy, soot-smudged building, it didn’t matter that it came out a bit darker.
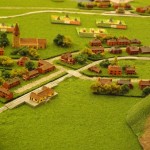
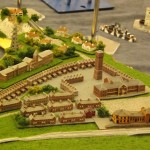
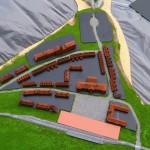
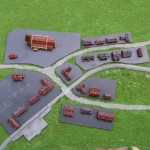
When I came to painting the town, with its multiple blocks of terraced houses, I was beginning to run out of time so I had to some up with a quicker way of getting them finished. In particular I was concerned about the hundreds of windows that the buildings had. To speed things up, after the undercoat I gave them a coat of Army Painter Fur Brown from a spray can. They were then rapidly drybrushed with Citadel Squig Orange, and the roofs painted grey. After a few details here and there they were given a generous coat of my trusty Army Painter Strong Tone Quickshade. This filled in the windows nicely – not quite as good as painting each window by hand, but a damn site quicker ! Unfortunately I mucked up the varnishing in my haste and it went white, otherwise the result would have been very effective.

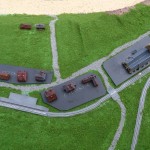
I decided early on not to glue the buildings directly to the terrain. Instead, they were glued to plasticard bases which were shaped to fit around the road network. This made the layout more flexible for future use, and also meant that during play the buildings could be moved out of the way to allow for nef bases to sit there instead. I had also considered delineating gardens around the houses with hedges and fences made from coarse flock and thin plasticard strips respectively, but after trying a test piece this was abandoned as too time consuming. Instead, I settled for sticking the painted buildings to the bases, flocking and then adding random bushes and trees around them. Below you can see some of the plastic bases as I tried laying them out.

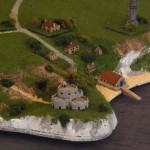
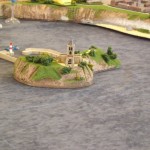
I also created a few special set-piece items for the terrain. One was a small island with a large church on the top, with a harbour and a few buildings at the foot of the hill. This is based on St Michael’s Mount in Cornwall, but using one of our Large Church models instead of a castle. The harbour walls were 3D printed as a single item, and the houses came from our Normandy set.
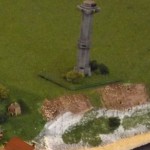
I made another 3D model of a lighthouse – Beachy Head, off the Sussex coast. This was then put on a base with some polystyrene rocks to create something akin to the Needles off the isle of Wight

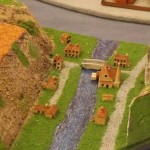
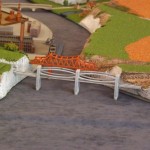
The estuary was crossed by a number of road and rail bridges. These again were modelled and 3D printed by Shapeways
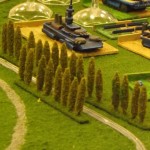
I stuck a few of our poplar tree models to wooden coffee stirrers, then painted and flocked – they looked pretty effective along the roads and railways lines.


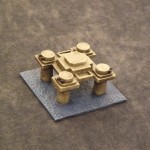
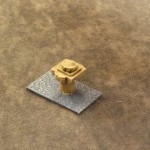
I also painted up some of our sea forts, Martello Towers and FlaK Towers to help defend the coast.

So there you have it – quite a few hours’ work, but worth it in the end !
You must be logged in to post a comment.