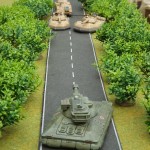
John Treadaway made an excellent job of painting his Stewart forces when he added them to the Hammer’s Slammers website last year. I was lucky enough to see them close-up earlier this year in a game at Maidstone (albeit from the wrong end of their gun barrels !) and was struck by the extra mile he goes with the addition of stowage and crew figures to his vehicles.
Suitably inspired, I decided that I wanted a Stewart detachment of my own, so set about putting one together. I also wanted to use the new Glengarry-hatted infantry, which weren’t available when John was assembling his forces.
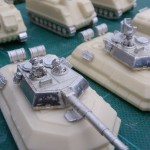
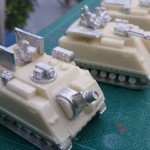
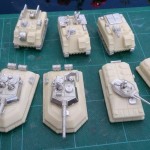
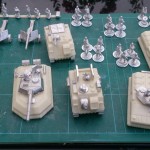
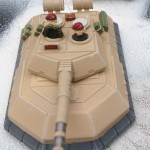
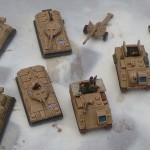
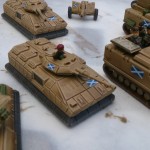
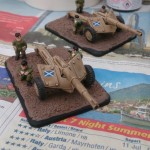
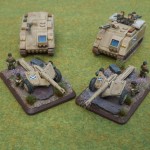
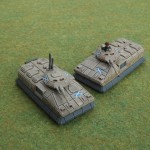
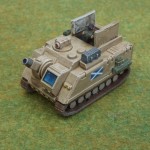
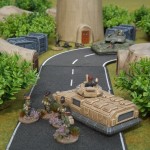
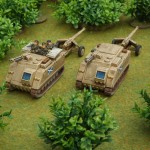
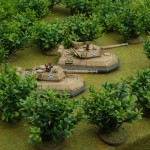
I started by cleaning the resin castings in soap and water and letting them dry. I then assembled the vehicles, which for the most part is straightforward – the Apollos and Artemis only have the hatches to glue on, some of which I left open for crew figures which were superglued straight in. One of the tanks got a radar antenna on the rear of the turret – there’s a circular detail piece behind the left hatch, which I drilled out with a 2mm bit and fitted the radar in there. Both tanks had external fuel drums glued to the hull rear (a bit fiddly, use gel super glue for this) and jerricans plus the odd storage box were glued onto the hulls and turrets.

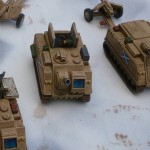
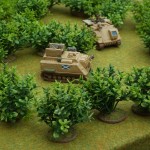
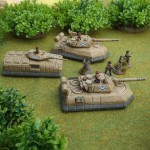
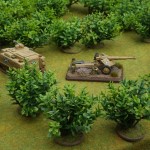
The Kunitsas take a bit more work, with the tracks, hatches and turrets all needing to be attached. I glued all of the rear hatches closed, but left two of the top hatches open. The mortar carrier’s hatches were glued upright and I added an infantry figure with binoculars after cutting him off at the waist with clippers. The second hatch was completely opened, and three riflemen were cut off and glued in the hatch (word to the wise – in future I think I’d paint these figures separately and glue them in after painting, as doing so in the confines of the vehicles was fiddly).
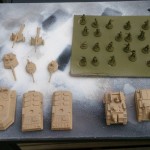
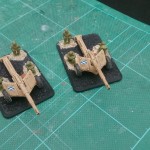
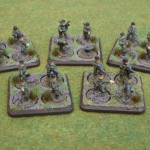
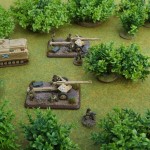
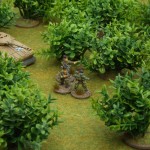
The infantry were cleaned up then glued to washers (I used thin plasticard to cover the holes in the washers). The gun crew weren’t based, but were stuck to a coffee stirrer for painting. The figures on washers were textured using PVA glue and sand to decorate the bases. You have two options for basing – using the washers allows the figures to be put in the sabot fireteam bases for games that require infantry to based in teams, but still allowing them to be used individually for skirmish games. Alternatively, the figures can be stuck straight into the resin fireteam bases and attached permanently.
Once all the glue was dry, everything – vehicles and figures – was undercoated in Halfords white automotive primer. This is a bit more expensive than some primers but a) the can is a lot bigger so you get more for your money and b) it sticks to anything – metal, resin, plastic – to give a good key for the main paint job. Once this had dried, the infantry were sprayed with Plastic Soldier Company Russian Uniform, while the vehicles were airbrushed with Vallejo Sand Yellow.
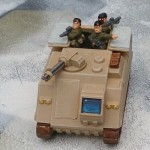
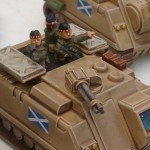
The vehicles were then pretty straightforward to finish. They were first drybrushed overall with Citadel Terminatus Stone (one of their ‘dry’ paints). Hover skirts were painted dark grey and drybrushed light grey, tracks were painted red-brown and drybrushed lightly with silver. The hatch interiors were painted very light grey, stowage in various shades of green, brown and grey and some parts of the gun barrels in gunmetal drybrushed with silver. The tank crew were given black coveralls and dark red berets, while the infantry in hatches were brush painted the same way as those on foot.
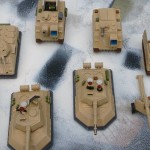
The next step was to brush on a coat of Army Painter Strong Tone (from the large tin, not the dropper bottle). This is messy, so I put the models on greaseproof paper and left them in a shed to dry which takes 24 hours or so (don’t leave them indoors if you can help it, the stuff stinks and, trust me, you will get complaints…).

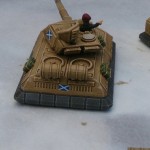
Once set, I added some Scottish Saltire decals which I sourced from eBay – these go on fine straight over the shiny Army Painter finish. Then the last task is to give them a clear flat coat – I use Tamiya XF-86 airbrushed on. This is an acrylic varnish so won’t react with the dip. The only time I tried Army Painter’s own clear coat in a spray can, it crazed horribly, so you have been warned…

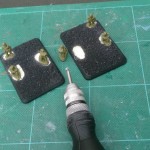
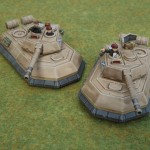
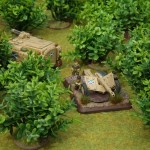
The resin figure bases were sprayed black and then the tops painted in Tamiya Flat Earth drybrushed in a pale sand colour. The sides were painted in Tamiya Flat Brown. With the two ant-tank gun bases, I used a cutting tool in a dremel to make some indentations in the bases for the gun crew (do this outside and wear a face mask – you do not want to breathe in the resin dust). The previously sprayed crew figures were superglued in and PVA glue and sand used to cover round the hole.
I try to keep the colour schemes on 15mm figures simple, just so I can get them painted in a sensible time. For these figures the steps were
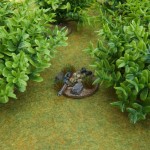
- Pouches, water bottle, packs in Citadel Kommando Khaki
- Guns in dark grey, highlighted light grey
- faces and hands in Citadel Elf Flesh
- boots in Tamiya Rubber Black
- Glengarries painted flat black. The band around the bonnet should be a red and white check pattern, but I approximated this by painting it white then adding red strips
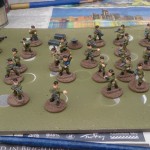

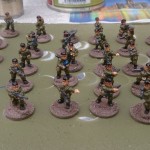
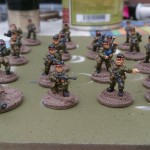
They were then also given a brush coat of AP Strong Tone and varnished with a flat coat once this had dried. I had a bit of bad luck with the varnish which decided to go frosty on me – this wasn’t too severe, but made the glengarries look a bit grey-ish (there was some damp in the air – the answer was not to panic, but to wait until the weather had dried out then varnish them again). Finally, I glued the odd small rock on some bases and applied flock – I got hold of some very nice grass tufts with purple blossoms from The Dice Bag Lady and used these to give a purple heather look to the bases and further emphasise the Scottish-ness of this unit.
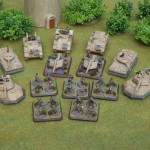
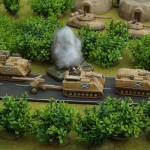
And there you have it – 2650 points of Hammer’s Slammers detachment ready for action.
You must be logged in to post a comment.